")
Vertex Ai Agent Designer in the Google Cloud console — Google ADK (Agent Development Kit)
Kickstart AI Agent Development with Vertex Ai Agent Designer. Agent Designer is a low-code visual designer that lets you design and test agents in the Google Cloud console. You can experiment with your agent in Agent Designer before transitioning development to code using Agent Development Kit.
Agent Designer facilitates the low-code creation and testing of AI agents by providing a visual, console-based environment within Vertex AI Agent Builder. It allows developers to experiment with agent logic and functionality before moving into a full coding environment.
Visual Workflow Creation
- The Flow Tab: This interface provides a visual representation of the agent’s workflow and control logic. Users can create a “main agent” and add various subagents to handle specific tasks.

- Low-Code Design: Because it is a visual designer, users can build out the structure of an agent’s behavior without writing initial boilerplate code.
Configuration and Customization
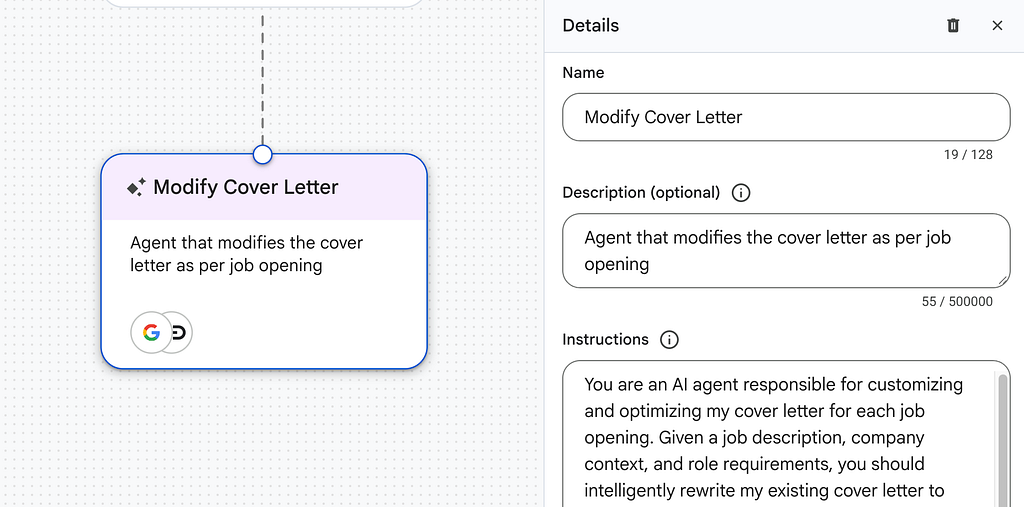
Through the Details panel, creators can define the core identity and capabilities of each agent:
- Instructions and Models: You can provide specific instructions to guide the agent’s behavior and select the specific generative model that will power its reasoning.

- Tool Integration: Agent Designer allows you to easily attach tools that expand the agent’s capabilities. These include Google Search for web queries, URL context for analyzing specific links, and Vertex AI Search Data Stores to ground the agent in private data.
- MCP Support: It supports connecting to Model Context Protocol (MCP) servers, which allows the agent to use a broader ecosystem of external tools.
Real-Time Testing and Iteration
- Preview Pane: As you build, a built-in Preview feature allows you to chat with the agent immediately. This enables you to test its responses and functionality in real-time to ensure it follows instructions and utilizes its tools correctly.
Transition to Development
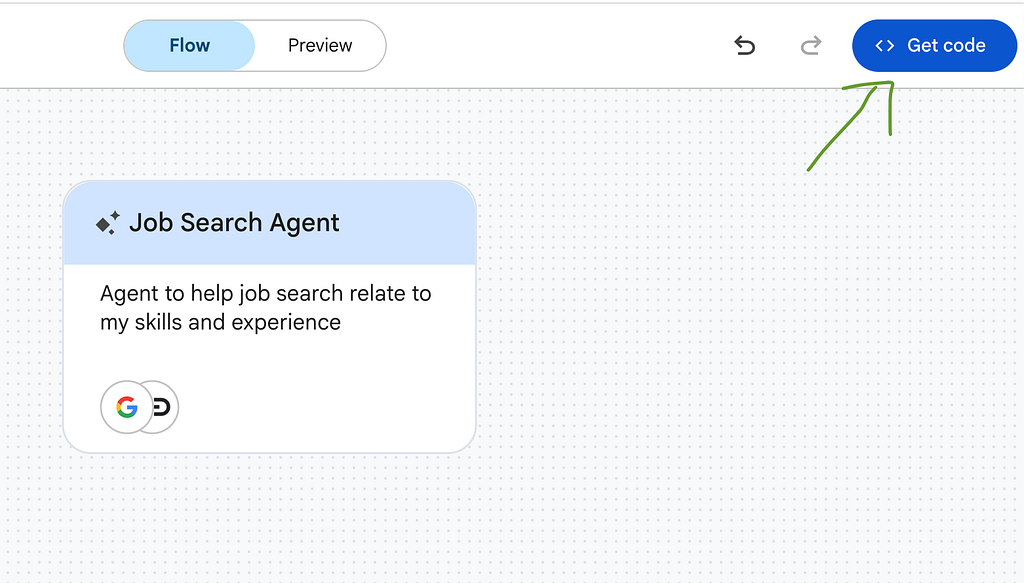
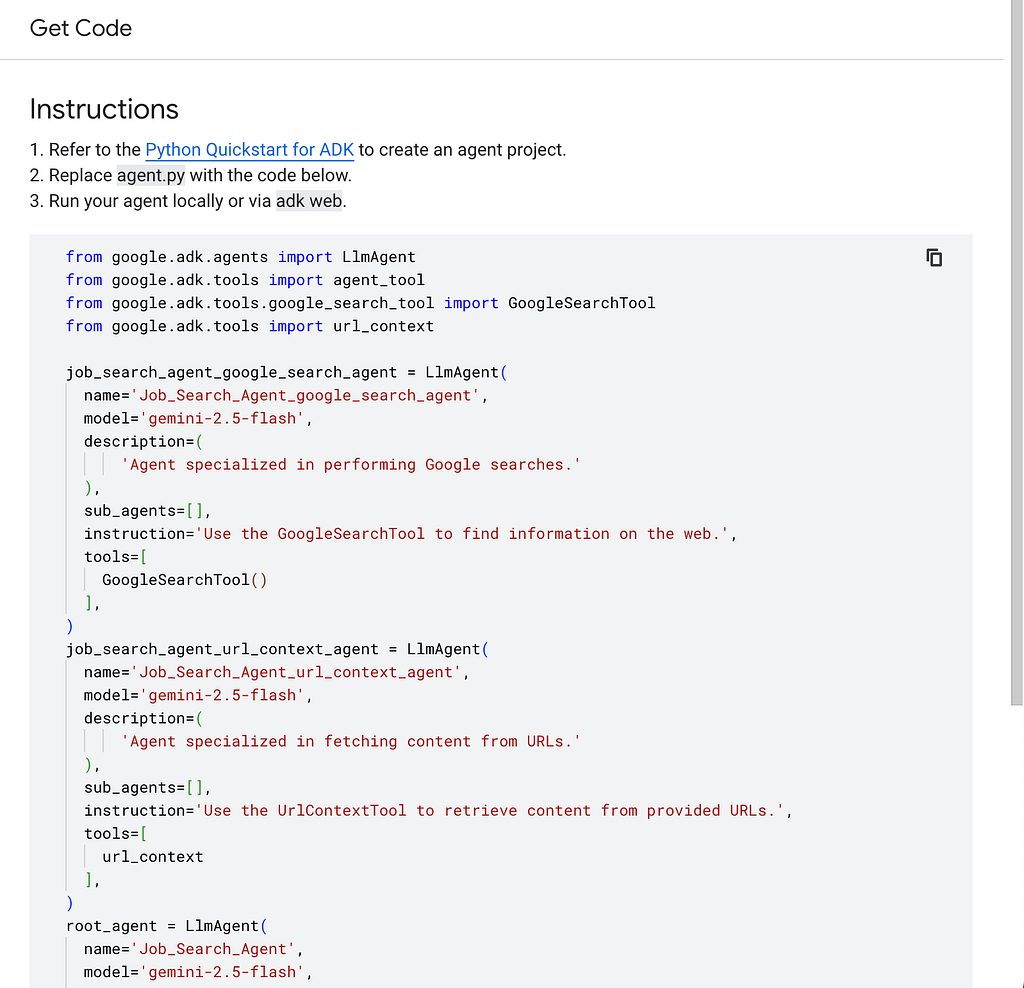
- Code Generation: Once the low-code design is complete, you can click “Get code” to view and copy the generated agent code. This facilitates a smooth transition from a visual prototype to professional development and deployment using the Agent Development Kit.
Think of Agent Designer like a digital blueprint and sandbox. Instead of building a house by writing out every measurement and material in a manual (coding), you use a visual architect tool to drag and drop rooms and furniture. Once you’ve “walked through” the virtual house to make sure it works, the tool generates the actual technical blueprints for the contractors to use.
Tools to be configured for agents within Agent Designer

Within the Agent Designer Details panel, you can configure several tools to expand the capabilities of your agent and its subagents. The primary tools available for configuration include:
- Google Search: This tool is toggled on by default and enables the agent to perform web searches to gather information.
- URL Context: Also enabled by default, this allows the generative model to analyze specific URLs included in the prompts sent to the agent.
- Vertex AI Search Data Store: This allows the agent to access and retrieve information from private data that has been indexed in a Vertex AI Search data store. Configuring this requires providing specific details such as the Project Number, Location, Data Store ID, and Collection ID. Additionally, you must grant the Discovery Engine User IAM role to the associated service account to enable access.
- Model Context Protocol (MCP) Server: You can add MCP tools by connecting the agent to an MCP server. By entering an MCP display name and an Endpoint URL, all tools within that connected server become available to the agent.
Note on MCP Authentication: Currently, Agent Designer only supports connecting to MCP servers that do not require authentication.
To add these tools, you navigate to the Tools section in the agent’s configuration panel and click the “Add tools” (+) icon.

Think of these tools as specialized apps on a smartphone. While the agent has its own “brain” (the generative model), adding Google Search is like giving it a web browser, URL context is like giving it a link reader, and a Vertex AI Search Data Store is like giving it access to a private, internal library of documents. The MCP Server acts like an external app store, allowing you to plug in even more specialized gadgets at once.
Required Project roles to use Agent Designer:
To use Agent Designer within Vertex AI Agent Builder, you must have specific project-level permissions and, depending on the tools you use, additional service account roles using IAM page.
Core Project Roles
To access and use the Agent Designer environment for creating and testing agents, you are required to have one of the following roles:
- Project Owner
- Project Editor
Tool-Specific Roles
If you choose to integrate a Vertex AI Search Data Store as a tool for your agent, there is an additional requirement for the service account associated with the platform. You must grant the Discovery Engine User role to the following service account:
service-PROJECT_NUMBER@gcp-sa-aiplatform-re.iam.gserviceaccount.com
This permission ensures that the agent has the necessary authorization to access and retrieve information indexed within your data store.
Think of the Project Owner or Editor roles as the master keys to the workshop; without them, you can’t even get through the front door to start building. The Discovery Engine User role is like a specific security clearance given to your assistant (the service account) so they can enter the private library (the data store) to fetch books for you while you work.
Set up a subagent within Agent Designer
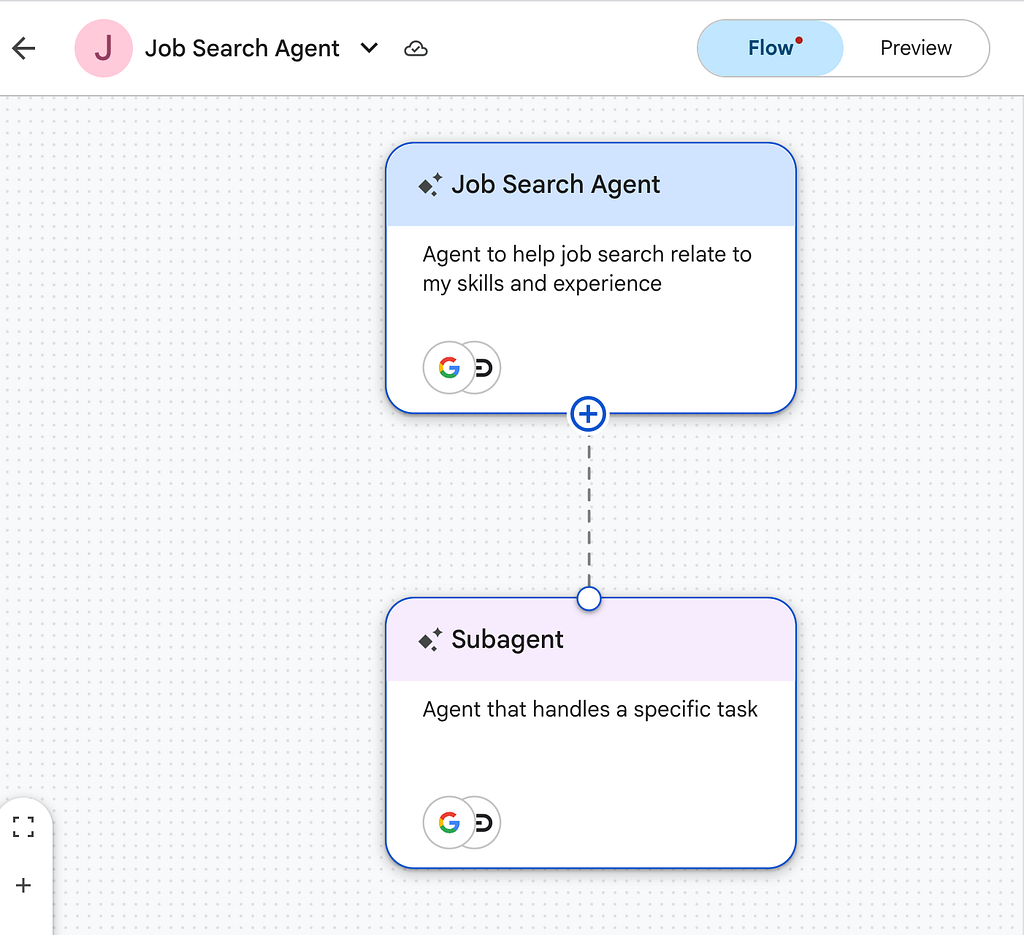
To set up a subagent within Agent Designer, you use the Flow tab to visually define your agent’s hierarchy and then configure the specific logic of each subagent in the Details panel.
Here is the step-by-step process for setting up a subagent:
1. Access the Agent Designer Canvas
- Navigate to the Agent Designer page in the Google Cloud console.
- Click Create agent to open a new canvas. Ensure you have the Project Owner or Editor role before starting.
2. Create the Subagent Visually
- Go to the Flow tab, which displays a visual representation of your agent’s workflow and control logic.
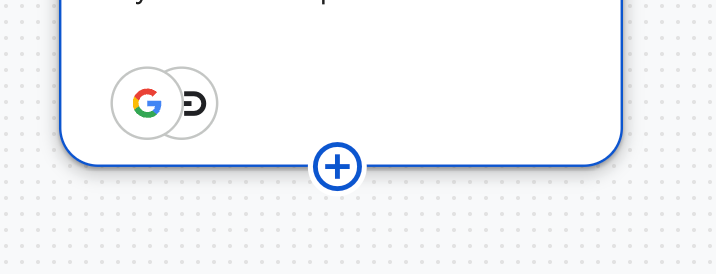
- Click Add a subagent (+) to introduce a new subagent into the flow.
3. Configure Subagent Details
Once the subagent is created, click on it to open the Details panel on the right side of the screen. In this panel, you must define the following:
- Name and Description: Provide an identifying name and a summary of the subagent’s specific purpose.
- Instructions: Enter clear prompts to guide how this specific subagent should behave and handle tasks.
- Model: Select the specific generative model that will power this subagent’s reasoning.
- Tools: Click Add tools (+) to give the subagent specialized capabilities, such as Google Search, URL analysis, or access to a Vertex AI Search Data Store.
Test and Refine your Agent


- Use the built-in Preview pane to chat with your agent in real-time.
- This allows you to verify that the subagent is correctly triggered and follows its instructions before you finalize the design.
Transition to Code
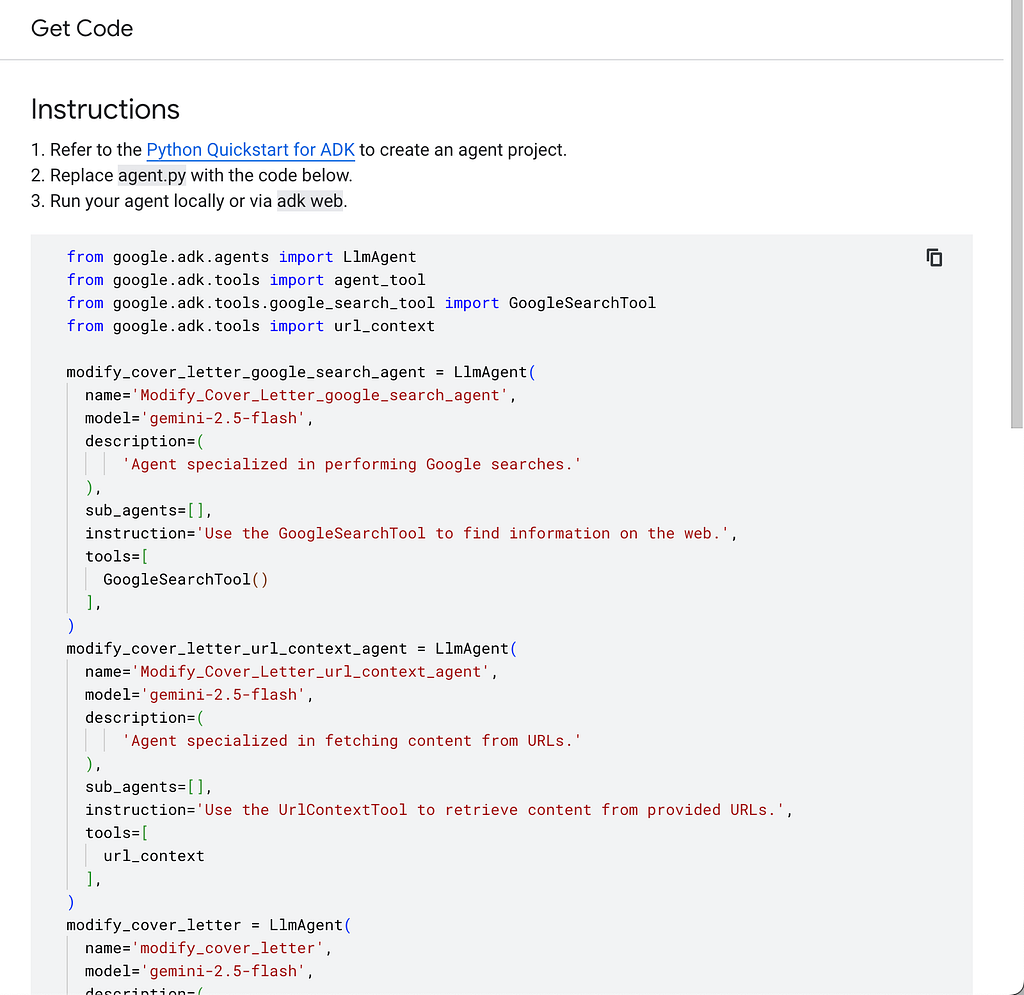
- After you are satisfied with the agent’s performance in the visual designer, click Get code.
- You can then copy this generated code into your own editor to continue development using the Agent Development Kit.
- Export to an Editor: After clicking “Get code,” you can copy and paste the generated code directly into the code editor of your choice.
- Utilize the Agent Development Kit (ADK): The ADK is the primary tool used to continue developing and eventually deploying the agent after it leaves the Designer. Developers can follow ADK tutorials to learn how to manage the agent’s lifecycle, including hosting and scaling.
- Expand Functionality: Transitioning to code allows developers to move beyond the visual designer’s constraints, enabling more complex integrations with frameworks like LangChain, LangGraph, or LlamaIndex.
- This workflow allows for a rapid prototyping phase where logic and tool configurations (like Google Search or Data Stores) are validated visually before moving into a professional development pipeline.
A complete Step by Step Guide of Designing Your Ai Agents using Vertex Ai:
https://medium.com/media/6760cfb7be4c3140324b4061cb154134/href
Ai Agent Designer in the Google Cloud console — Google ADK (Agent Development Kit) was originally published in Google Cloud – Community on Medium, where people are continuing the conversation by highlighting and responding to this story.
Source Credit: https://medium.com/google-cloud/ai-agent-designer-in-the-google-cloud-console-google-adk-agent-development-kit-6cdb4a9da1eb?source=rss—-e52cf94d98af—4


