
Stop writing Python scripts for mass embeddings. The future of high-scale AI is batch processing inside the database.
For modern startups, “Search” is no longer just a feature — it’s the product. Users don’t want to guess keywords anymore. They want to ask questions. They want Flexible Context, not rigid string matching.
But here is the trap most engineering teams fall into: They build a great prototype using a Python script that loops through their data, calls an Embedding API, and saves the vectors. It works perfectly for 100 items.
Then they launch. They hit 100,000 items. The script crashes. The API rate limits hit. The latency spikes. Suddenly, they are managing a distributed queueing system (Kafka/Celery) just to keep their search index updated.
We need to kill the “Python Loop.”
If you are a startup bootstrapping quickly, or an enterprise migrating off a legacy stack, you don’t have time to build complex data pipelines just to get Vector Search.
Today, I’m going to show you how to replace your entire embedding pipeline with a single SQL statement using AlloyDB AI.
The Problem
Keyword Search is Brittle
Legacy stacks rely on LIKE %keyword% or ts_vector.
- User asks: “How do I fix my billing error?”
- Keyword Search: Returns articles containing “error” (hundreds of irrelevant results).
- The Goal: We want Semantic Search that understands “billing error” relates to “payment failure” or “invoice dispute.”
The Old Way: The “Application Loop Tax”
To upgrade to Vector Search, developers usually write “Glue Code”:
- Query the database for rows without embeddings.
- Loop through them in Python.
- Send each text chunk to an Embedding Model (Vertex AI).
- Catch errors/retries.
- Loop again to update the database.
This “Loop-based” architecture is slow, expensive to maintain, and fundamentally unscalable.
The New Way: Database-Driven Embeddings at Scale
With AlloyDB AI, the embedding generation logic lives inside the database engine. You treat the AI model like a standard SQL function.
Instead of a Python loop processing row-by-row, you execute a bulk update. The database engine optimizes the batching, parallelization, and connection management.
The Use Case: Modernizing a SaaS Knowledge Base
Let’s say you have a table help_articles with 50,000 rows. You want to make it searchable by meaning, not just keywords.
Step 0: AlloyDB Quick Setup
Before we dive into the code, we need to set up the “brain” of our application.
Let’s set that up really quickly by following steps 2 & 3 of this codelab:
Connect your application to AlloyDB data and deploy on Cloud Run | Google Codelabs
Step 1: Schema Provisioning
Once you have your AlloyDB cluster and instance running, head over to the AlloyDB Studio SQL editor to enable the AI extensions and provision the schema.
First, let’s create the table and populate it with synthetic data using PostgreSQL’s generate_series. This simulates a production-scale dataset instantly.
-- 1. Enable AI and Vector Extensions
CREATE EXTENSION IF NOT EXISTS "google_ml_integration" CASCADE;
CREATE EXTENSION IF NOT EXISTS vector;

-- 2. Create the table
CREATE TABLE help_articles (
    id SERIAL PRIMARY KEY,
    title TEXT,
    category TEXT,
    product_version TEXT,
    content_body TEXT,
    embedding vector(768) -- Dimension for text-embedding-005
);

-- 3. Generate 50,000 rows of synthetic data
INSERT INTO help_articles (title, category, product_version, content_body)
SELECT
    'Help Article ' || i,
    CASE
        WHEN i % 3 = 0 THEN 'Billing'
        WHEN i % 3 = 1 THEN 'Technical'
        ELSE 'General'
    END,
    CASE
        WHEN i % 2 = 0 THEN '2.0'
        ELSE '1.0'
    END,
    'This article covers common issues regarding ' ||
    CASE
        WHEN i % 3 = 0 THEN 'payment failures, invoice disputes, and credit card updates.'
        WHEN i % 3 = 1 THEN 'connection timeouts, latency issues, and API errors.'
        ELSE 'account profile settings, password resets, and user roles.'
    END
FROM generate_series(1, 50000) AS i;
Now we have 50,000 rows of text data, but the embedding column is NULL.
Enable Database Flags
Go to the Instance configuration console, click “Edit Primary”, go to Advanced Configuration and click “Add Database Flags”.
- Verify that the google_ml_integration.enable_model_support flag is set to on. If not enter it in the flags drop down and set it to “ON” and update instance.
- Verify thatgoogle_ml_integration.enable_faster_embedding_generation flag is set to on. If not enter it in the flags drop down and set it to “ON” and update instance.
- Verify that the google_ml_integration extension is version 1.5.2 or higher:
- To check your extension version with the following command:
SELECT extversion FROM pg_extension WHERE extname = 'google_ml_integration';
If you need to update the extension, use the ALTER EXTENSION google_ml_integration UPDATE; command.
Grant Permission
1. To let a user manage auto embedding generation, grant INSERT, UPDATE, and DELETE permissions on the google_ml.embed_gen_progress and google_ml.embed_gen_settings tables:
GRANT INSERT, UPDATE, DELETE ON google_ml.embed_gen_progress TO 'USER_NAME';
Replace the USER_NAME placeholder with the name of the user for whom the permissions are granted (in this case ‘postgres’)
2. Run the below statement to grant execute on the “embedding” function:
GRANT EXECUTE ON FUNCTION embedding TO postgres;
Grant Vertex AI User ROLE to the AlloyDB service account
From Google Cloud IAM console, grant the AlloyDB service account (that looks like this: service-<<PROJECT_NUMBER>>@gcp-sa-alloydb.iam.gserviceaccount.com) access to the role “Vertex AI User”. PROJECT_NUMBER will have your project number.
Alternatively you can run the below command from the Cloud Shell Terminal:
PROJECT_ID=$(gcloud config get-value project)
gcloud projects add-iam-policy-binding $PROJECT_ID \
  --member="serviceAccount:service-$(gcloud projects describe $PROJECT_ID --format="value(projectNumber)")@gcp-sa-alloydb.iam.gserviceaccount.com" \
--role="roles/aiplatform.user"
Step 2: The One-Shot Migration & Automation
We don’t need to write a migration script. We don’t even need to write a Trigger for future updates. We can do both in one command using the ai.initialize_embeddings function:
CALL ai.initialize_embeddings(
  model_id => 'text-embedding-005',
  table_name => 'help_articles',
  content_column => 'content_body',
  embedding_column => 'embedding',
  incremental_refresh_mode => 'transactional'
);
What just happened?
- Backfill at Scale: It automatically sweeps through your existing 50,000 rows and generates embeddings via Vertex AI.
- Automation: by setting incremental_refresh_mode => 'transactional', AlloyDB automatically sets up the internal triggers. Any new row inserted into help_articles will have its embedding generated instantly.
- You can optionally set the incremental_refresh_mode => 'None' so you can only get the statement to do bulk updates and manually call ai.refresh_embeddings() for updating all rows embeddings.
You just replaced a Kafka queue, a Python worker, and a migration script with 6 lines of SQL. Here is the detailed official documentation for all attributes.
Tuning Batch Size
For details on this one, refer to this blog. Currently AlloyDB defaults batch size to 50 out of the box. While defaults work great out of the box, AlloyDB still gives users the control to tune the perfect configuration for your unique model and dataset.
CALL ai.initialize_embeddings(
  model_id => 'text-embedding-005',
  table_name => 'help_articles',
  content_column => 'content_body',
  embedding_column => 'embedding',
  incremental_refresh_mode => 'transactional',
  batch_size => 20
);
However users need to be aware of quota limits that can limit the performance. To review the recommended AlloyDB quotas, consult the Before you begin section in the documentation.
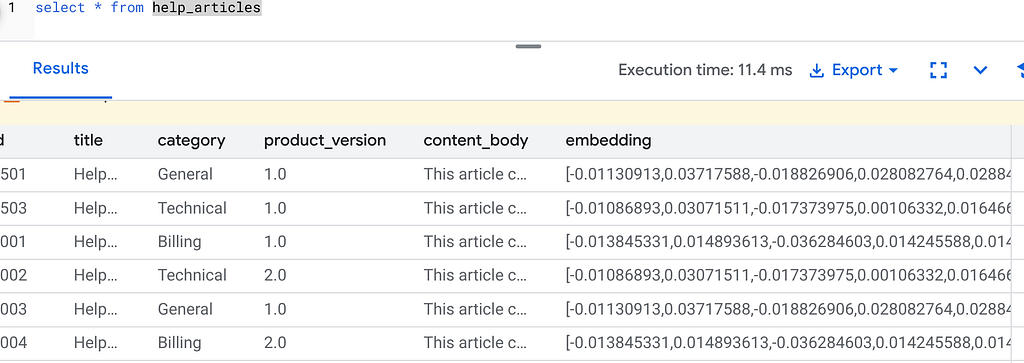
Now if you run the following query to verify that the Embeddings are generated:
select * from help_articles;
Step 3: The “Flexing Context” Search
Now, we replace the brittle Keyword search with Hybrid Search. We combine the precision of SQL filters (e.g., “only show articles for Version 2.0”) with the flexibility of Vector search.
SELECT
  title,
  left(content_body, 100) as content_snippet,
  1 - (embedding <=> embedding('text-embedding-005', 'Invoice did not go through')::vector) as relevance
FROM help_articles
WHERE category = 'Billing'  -- The SQL Filter (Hard Constraint)
  AND product_version = '2.0'
ORDER BY relevance DESC
LIMIT 5;
This is Flexing Context. The search “flexes” to understand the user’s intent (“billing issues”) while respecting the rigid business constraints (Version 2.0).

Why this wins for Startups & Migrations
- Zero Infrastructure Debt: You didn’t spin up a separate Vector DB (Pinecone/Milvus). You didn’t write a separate ETL job. It’s all in Postgres.
- Real-Time Updates: By using the 'transactional' mode, your search index is never stale. The moment data is committed, it is vector-ready.
- Scale: AlloyDB is built on Google’s infrastructure. It can handle the bulk generation of millions of vectors faster than your Python script ever could.
For Custom Embedding Models in Batch Mode
If you want to use a custom or externally supported model that supports batching, define the batch transform functions and specify them as model_batch_in_transform_fn and model_batch_out_transform_fn when you create a model. You can also specify a batch_size in the initialize_embeddings call. For models that support batching, we recommend that you use a batch_size greater than 1 for better performance. Read more about it here.
The Bottom Line
If you are bootstrapping, don’t waste your runway building data pipelines. If you are migrating, don’t over-engineer the move. Stop looping. Start querying.
One Million Vectors, Zero Loops: Generating Embeddings at Scale with AlloyDB was originally published in Google Cloud – Community on Medium, where people are continuing the conversation by highlighting and responding to this story.
Source Credit: https://medium.com/google-cloud/one-million-vectors-zero-loops-generating-embeddings-at-scale-with-alloydb-e6914edadb97?source=rss—-e52cf94d98af—4


