PostgreSQL for the SQL Server Pro
Let’s build a zero-footprint PostgreSQL playground in under 10 minutes!
Today I am going to look at the options for getting a local version of PostgreSQL up and running for testing. Most of the posts in this series will focus either on Google’s Cloud SQL for PostgreSQL or AlloyDB for PostgreSQL, but it is important to understand how to get a local PG database running to help understand the internals better. While this is a series focused both on SQL Server and PostgreSQL, I will focus on running PostgreSQL from a container today. I’ll show you how to run SQL Server from a container on Linux in the future. No Windows GUI installs today. 🙂
Why Run a Database in a Container?
Containers package an application along with its binaries, libraries, and configuration files into a single, portable unit. Because they share the host operating system’s kernel rather than virtualizing hardware, containers are lightweight, fast to start, and consume minimal resources. For database development, the greatest advantage is isolation: you don’t need to pollute your host OS with database binaries, manage background system services, or clean up leftover files when you’re done. You can spin up a pristine instance, run your experiments, and tear it down in seconds.
Stateful Data
The most interesting architectural challenge with running databases in containers is state management. Containers are designed to be stateless and ephemeral(short-lived). By default, any data written inside a running container lives in a temporary writable layer that disappears when the container is deleted or recreated.
Databases, on the other hand, are inherently stateful — their entire job is durability and preserving data across restarts and crashes. To bridge this gap, container environments decouple the database engine process from the underlying storage by using persistent volumes. By mounting an external storage volume or directory to the container’s data path, the database files live safely on persistent host or network storage. This allows you to destroy, recreate, or upgrade the container whenever you want without losing any data.
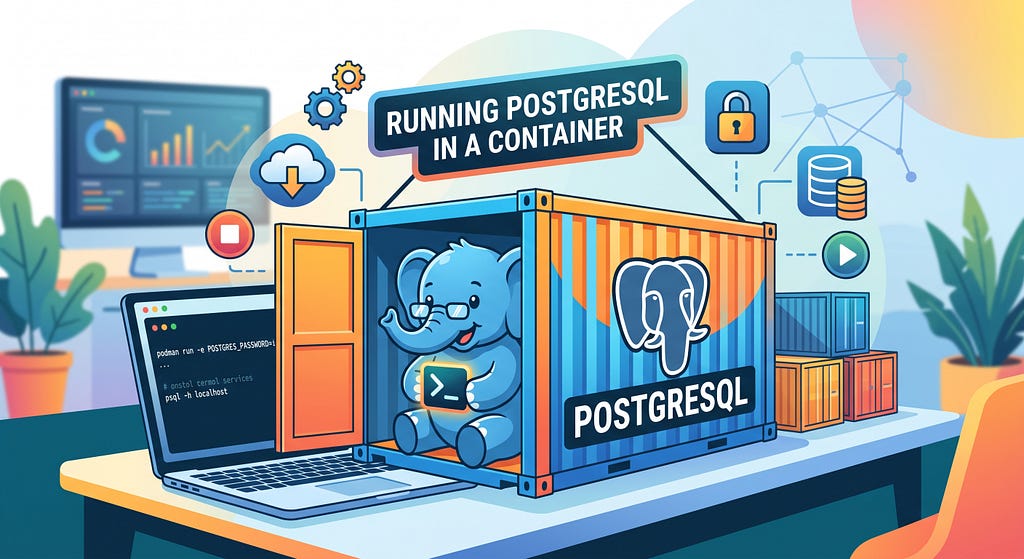
Running PostgreSQL in a Container
For this walk-through, I am using the Podman container engine (an open-source project created and maintained by Red Hat). If you prefer Docker, the commands below are practically identical.
Open a terminal in Linux and run the following command (make sure your machine has internet access to pull the image).
podman run --name pg-playground \
-e POSTGRES_PASSWORD=Password12345 \
-p 5432:5432 \
-v pgdata:/var/lib/postgresql/data \
-d docker.io/library/postgres:16
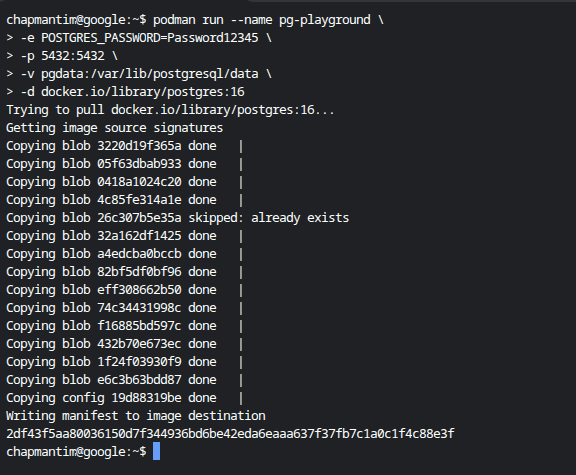
Note: if you happen to be using docker for this, just replace the podman command with the word “docker” and you’re all set.
Here is a breakdown of what the above podman parameters are doing:
–name pg-playground: Names the container so you don't have to use a container ID.
-e POSTGRES_PASSWORD=Password12345: Sets the password for the default postgres superuser account.
-p 5432:5432: Maps host port 5432 (left of the colon) to PostgreSQL’s default port 5432 inside the container (right of the colon). If your host machine already uses 5432, you can map a different host port (e.g., -p 5433:5432).
-v pgdata:/var/lib/postgresql/data: Creates a named storage volume called pgdata on your host and mounts it to PostgreSQL’s internal data directory, ensuring all database files and transaction logs persist even if the container is stopped or deleted.
-d: Runs the container in the background. In this case the image for PostgreSQL is being pulled from the repository at docker.io. postgres:16: Specifies the PostgreSQL 16 image.
Note: while I do specify the named storage volume for the PostgreSQL files, it is not required for this exercise. Skipping the -v flag makes the instance completely disposable, which is fine for quick testing, but named volumes are standard practice whenever you want data to survive container upgrades or teardowns.
Connect to the PostgreSQL Container
Now that we have PostgreSQL up and running in a container, we need to connect to it. We have several options, a couple of which I am going to cover today.
Option 1: Use podman exec to run psql inside the container
The container image already has the psql client installed, so you don’t even need database tools on your host machine. You can jump directly into an interactive session via Podman:
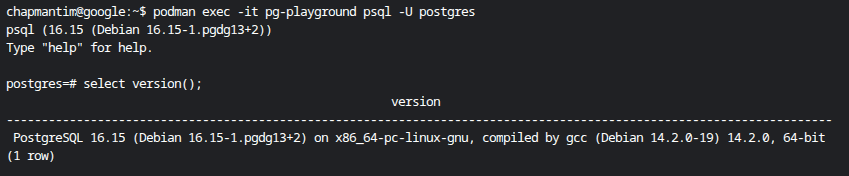
podman exec -it pg-playground psql -U postgres
This drops you into an interactive psql prompt. From here, you can run queries directly against the engine. For example, let’s check the database version by calling the version() function (the PostgreSQL equivalent of SQL Server’s @@VERSION):
SELECT version();
Here we can see the output from the call to my container instance:
Option 2: Install psql locally on your host OS
If you prefer running client tools directly from your host terminal, you can install the PostgreSQL client package (package manager commands will vary depending on your Linux distribution, such as Debian/Ubuntu vs. RHEL/Fedora):
sudo apt update && sudo apt install -y postgresql-client
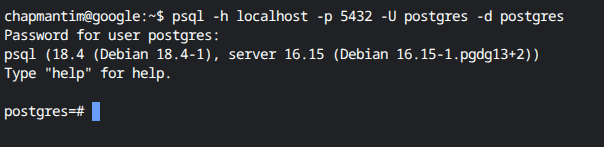
Then you can connect directly via psql. I am omitting the password parameter for the call, so PostgreSQL will prompt me to enter it as it connects:
psql -h localhost -p 5432 -U postgres -d postgres
Of course, you can also connect via GUI tools like pgAdmin or DBeaver (my favorite) — and I’ll cover these in an upcoming post.
Creating Your First Database
Let’s create a database to test with. In honor of our SQL Server background, we’ll name it after Microsoft’s sample AdventureWorks database:
CREATE DATABASE adventureworks;
Notes:
1. Object names in PostgreSQL are automatically converted to lowercase internally, unless they are enclosed in double quotes (“AdventureWorks”). If you type AdventureWorks without double quotes, the engine will still name it adventureworks.
2. The semicolon (;) is required to terminate SQL statements in psql. While T-SQL often lets you get away without them, the psql client buffers multi-line input and will keep waiting until it encounters a semicolon (or \g) before sending your query to the server.
Switching Database Context
Now that the database is created, we need to switch our context to it. In SQL Server, you would execute the USE command within your existing session. In PostgreSQL, there is no USE statement because a backend connection is strictly tied to a single database.
To switch databases in psql, use the \c meta-command (which drops your current connection and reconnects you to the specified database):
# Establish new connection to adventureworks db
\c adventureworks
You will see: You are now connected to database "adventureworks" as user "postgres". Your prompt will change to adventureworks=#.

Cleaning Up The Playground
One of the best features of containerized development is leaving zero footprint on your machine when you’re done. Here is how to tear down the environment:
First, exit the psql prompt:
# Exit psql
\q
Next, stop the running container and remove it:
# Stop the container
podman stop pg-playground

# Remove the container
podman rm pg-playground
Finally, let’s clean up the image and storage volume from your disk. This removes the cached PostgreSQL container image and permanently deletes the persistent data volume:
# Remove the downloaded image from cache
podman rmi docker.io/library/postgres:16

#Remove the persistent volume
podman volume rm pgdata
Wrapping Up
And that’s it — your environment is back where we started. In under ten minutes, we spun up a modern PostgreSQL 16 engine, walked through a handful of architectural differences from SQL Server — from session-level database binding to volume persistence — and tore the entire stack down. This gives you a playground to experiment with PostgreSQL internals before we move into managed cloud engines like Cloud SQL and AlloyDB.
Running PostgreSQL in a Container was originally published in Google Cloud – Community on Medium, where people are continuing the conversation by highlighting and responding to this story.
Source Credit: https://medium.com/google-cloud/running-postgresql-in-a-container-7bece5d2676d?source=rss—-e52cf94d98af—4
About the Author