Embed Gemini Enterprise actions directly into your proprietary internal tools with this step-by-step guide to programmatic execution.
In addition to its search capabilities, the Gemini Enterprise App offers many ways of helping users with common tasks. In particular, actions enable users to create emails or calendar events directly from the Gemini Enterprise App search bar. This elevates Gemini Enterprise from a passive, “read-only” AI assistant to an active agentic platform and central orchestrator that enables users to perform cross-platform actions from a single assistant interface, without the need for context switching.
However, some organizations may prefer to access Gemini Enterprise programmatically, without using the Gemini Enterprise App. The most common reasons are organizations which want to embed Gemini’s capabilities directly into their own existing proprietary internal tools (such as native ERPs, HR portals, or custom CRMs) rather than requiring users to switch tabs to the Gemini Enterprise App, or users who need additional interface customization beyond what is currently offered in the App today.
In this post, we will demonstrate how to execute actions via the API, leveraging the following APIs to build, authorize and execute an action using the Google Calendar connector.
- buildActionInvocation to validate the actionName and build the action invocation;
- acquireAndStoreRefreshToken to obtain and store a refresh token;
- executeAction to put everything together and execute the action.
Obtaining the actionName
Before we even start, we will need to obtain the relevant actionName, which identifies the action that we want to execute. The response to getDataConnector for an existing collection and connector includes the .bapConfig.enabledActions field which looks promising, for example:
{
  "name": "projects/<<PROJECT_NUMBER>>/locations/global/collections/<<COLLECTION_ID>>/dataConnector",
  "state": "ACTIVE",
  "dataSource": "google_calendar",
  "refreshInterval": "0s",
  "entities": [
    {
      "entityName": "google_calendar",
      "dataStore": "projects/<<PROJECT_NUMBER>>/locations/global/collections/default_collection/dataStores/<<ENTITY_ID>>"
    }
  ],
  "createTime": "2026-01-20T21:24:15.835041Z",
  "actionConfig": {
    "isActionConfigured": true,
    "createBapConnection": true
  },
  "updateTime": "2026-02-13T18:59:48.340039Z",
  "identityScheduleConfig": {
    "refreshInterval": "86400s"
  },
  "bapConfig": {
    "supportedConnectorModes": [
      "ACTIONS"
    ],
    "enabledActions": [
      "create_calendar_event",
      "update_calendar_event"
    ]
  },
  "connectorType": "GOOGLE_CALENDAR",
  "connectorModes": [
    "FEDERATED",
    "ACTIONS"
  ],
  "actionState": "ACTIVE"
}
However, at time of writing, discrepancies exist between the action names returned by getDataConnector and those required for buildActionInvocation and executeAction. Instead here is a list of actionNames that I have been able to verify thus far:
- Gmail connector: send_email
- Google Calendar connector: create_calendar_event
- ServiceNow connector: create_servicenow_incident, update_servicenow_incident
- Jira on Cloud connector: create_jira_issue, update_jira_issue
Building the action invocation
To execute an action, we will need to provide a valid JSON representation of the action including all required arguments. We can obtain the schema for this by invoking buildActionInvocation and providing the actionName, which will gives us:
{
  "actionInvocation": {
    "actionName": "create_calendar_event",
    "args": {
      "duration": 30
    },
    "dataConnector": "projects/<<PROJECT_NUMBER>>/locations/global/collections/<<COLLECTION_ID>>/dataConnector",
    "actionDisplayName": "Create Calendar Event",
    "authorizationUrl": "https://accounts.google.com/o/oauth2/v2/auth?<<REDACTED_CLIENT_ID_AND_SCOPES>>",
    "parameterDeclaration": {
      "properties": {
        "attendees": {
          "description": "List of email addresses of attendees, the requesting user is automatically added to the list.",
          "items": {
            "format": "email",
            "type": "STRING",
            "description": "Email address of the attendee"
          },
          "x-display-name": "Attendees",
          "type": "ARRAY"
        },
        "start_time": {
          "format": "date-time",
          "x-display-name": "Start time",
          "type": "STRING",
          "description": "Start time of the event, e.g. 2024-07-12T23:30."
        },
        "duration": {
          "x-display-name": "Duration (minutes)",
          "type": "INTEGER",
          "description": "Duration of the event in minutes. Defaults to 30 minutes.",
          "default": 30
        },
        "timezone": {
          "description": "Time zone for the event start and end times. Provided as a IANA Time Zone Database name, e.g. \"Europe/Zurich\". If omitted, the timezone of the user will be used.",
          "x-display-name": "Timezone",
          "type": "STRING"
        },
       "title": {
          "description": "Title of the event. If omitted, a title will be generated based on the number of attendees.",
          "x-display-name": "Title",
          "type": "STRING"
        },
        "description": {
          "description": "Description of the event.",
          "x-display-name": "Description",
          "type": "STRING",
          "format": "long-form"
        }
      },
      "required": [
        "attendees",
        "start_time",
        "timezone"
      ],
      "type": "OBJECT"
    },
    "userConfirmationMessage": "I've created a draft for you to create a calendar event. Please edit if necessary, and confirm below.",
    "dataSource": "google_calendar"
  }
}
The response includes a few fields of interest:
- .actionInvocation.authorizationUrl, which tells us that we need to authorize the connector — we will do this in the next section. If you do not see this field, it likely means that the connector already has a valid token and does not require user authorization.
- Note: if you have previously already authorized connector actions but want to run through the authorization process again, you can revoke access from the connected system. For Google Calendar, this can be done via “Manage your Google Account” > “Linked apps”.
- .actionInvocation.parameterDeclaration, which is a self-explanatory schema for the action invocation.
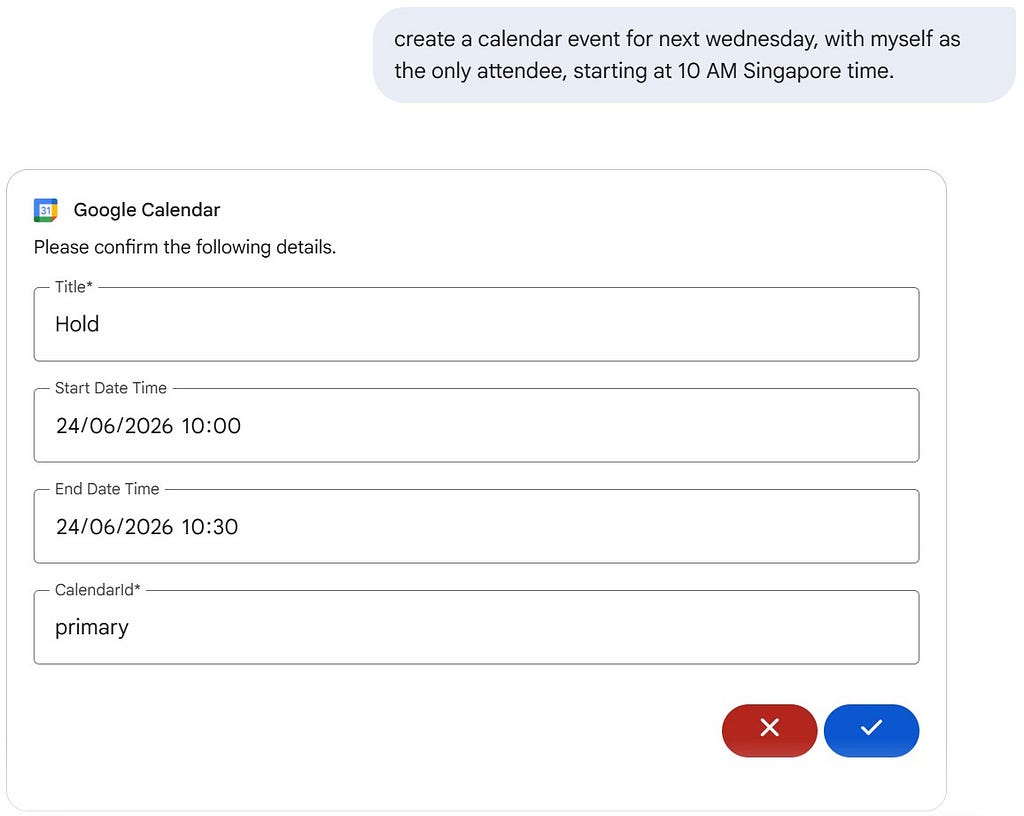
- .actionInvocation.userConfirmationMessage, which you will also see in the Gemini Enterprise App when the assistant requires human-in-the-loop (HITL) approval for any mutative action, as can be seen in the screenshot below:
Obtaining a connector token
Gemini Enterprise uses OAuth for user access delegation, enabling agents to act on behalf of users without exposing user credentials. For demonstration purposes, we will perform these steps manually below. In production, your application should handle the grant flow (see for example https://developers.google.com/identity/protocols/oauth2/javascript-implicit-flow).
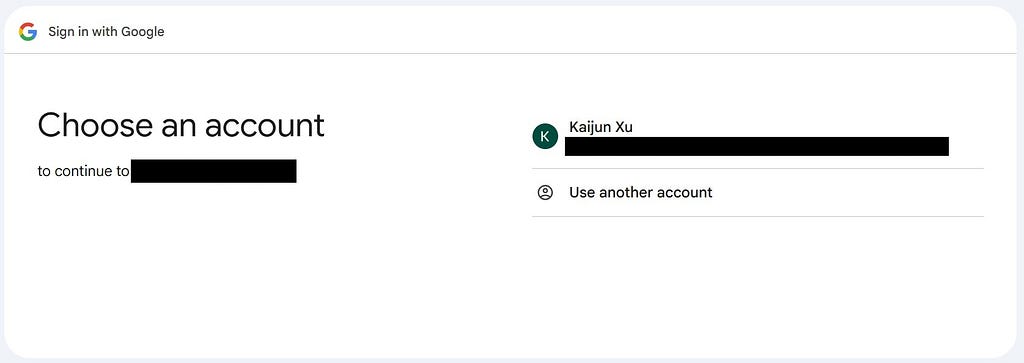
We start by appending a redirect URI (for Google Calendar, &redirect_uri=https://vertexaisearch.cloud.google.com/oauth-redirect) to the authorizationUrl from the previous step, and opening the resulting URL in a browser. For Google Calendar, this brings us to the familiar “Sign in with Google” screen:
After running through the authorization steps, copy the URL from the final screen — it should look similar to this:
https://vertexaisearch.cloud.google.com/oauth-redirect?state=<<REDACTED>>&iss=https://accounts.google.com&code=<<REDACTED>>&scope=email+profile+https://www.googleapis.com/auth/calendar.events+https://www.googleapis.com/auth/calendar.readonly+https://www.googleapis.com/auth/contacts.readonly+https://www.googleapis.com/auth/userinfo.email+https://www.googleapis.com/auth/userinfo.profile+openid&hd=<<REDACTED>>&prompt=consent
Invoke acquireAndStoreRefreshToken, passing the URL above as the fullRedirectUri. In this scenario, a successful invocation returns an empty response.
Executing the action
Now that we have authorized the connector to take action on Google Calendar, we can put together the request body for executeAction using the schema retrieved earlier.
{
  "actionName": "create_calendar_event",
  "args": {
     "attendees": ["kaijunxu@google.com","invitee2@example.com","invitee3@example.com"],
    "start_time": "2026-06-24T10:00",
    "duration": 45,
    "timezone": "Asia/Singapore",
    "title": "Meeting created using GE API",
    "description": "Demo meeting invite created using executeAction API"
  }
}
Note that the attendees list does not need to include the requesting user (i.e. the meeting organizer). Since I am using a demo account for this post, I have included my corporate account in the attendee list, along with two additional example emails purely for demonstration purposes.
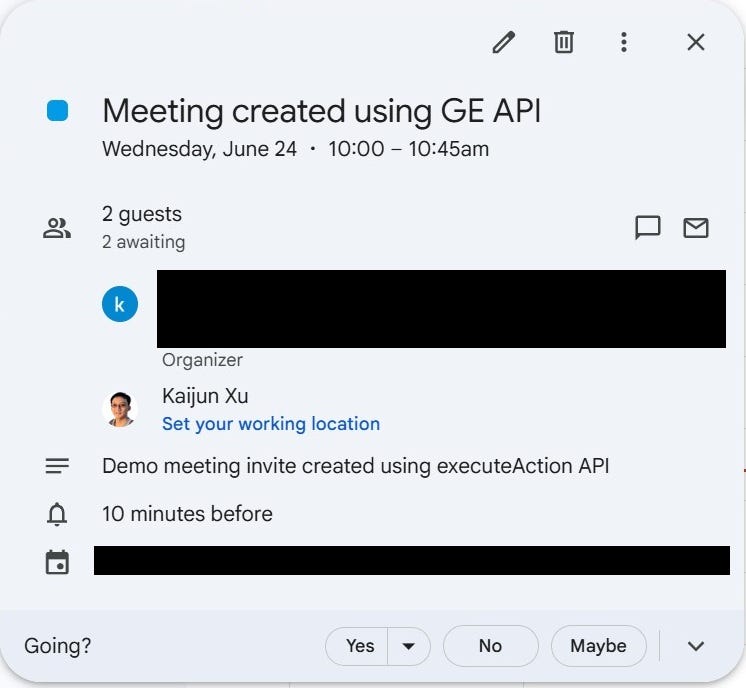
In this request, I am creating a calendar invite for 24 June 2026, starting at 10AM Singapore time and lasting for 45 minutes. I have included a meeting title and description, and also specified a non-default meeting duration to demonstrate all the available parameters for this specific action.
The response to a successful invocation includes a null status (since there is no error) and details of the result — in this case, the created calendar event:
{
  "status": {},
  "textResult": "Created meeting: [Meeting created using GE API](https://www.google.com/calendar/event?eid=<<BASE64_ENCODED_ID>>)",
  "result": {
    "message": "Created meeting: [Meeting created using GE API](https://www.google.com/calendar/event?eid=<<BASE64_ENCODED_ID>>)",
    "event_id": "<<EVENT_ID>>",
    "event_url": "https://www.google.com/calendar/event?eid=<<BASE64_ENCODED_ID>>"
  }
}
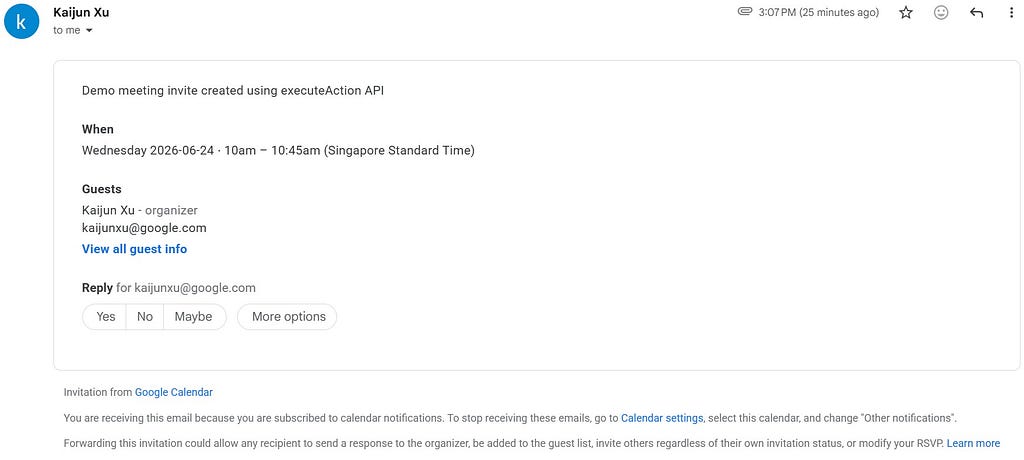
Attendees will receive a calendar invitation and see the event on their calendars. The screenshots below show the invitation and calendar event sent to my email.
Next steps
New features for Gemini Enterprise are planned to roll out over the coming months, including Gemini Spark in Gemini Enterprise, bringing the 24/7 personalized AI agent experience to the security and governance of Gemini Enterprise. Learn more about Gemini Enterprise Agent Platform and get started with Gemini Enterprise today.
Beyond the App: Programmatic Access to Gemini Enterprise Actions was originally published in Google Cloud – Community on Medium, where people are continuing the conversation by highlighting and responding to this story.
Source Credit: https://medium.com/google-cloud/beyond-the-app-programmatic-access-to-gemini-enterprise-actions-770fb5bc5908?source=rss—-e52cf94d98af—4
About the Author